Receiving NDI® Streams from Different Subnets with NDI® Decoding Software
Network administrators often divide IP networks into multiple subnets for various reasons, such as simplifying network management, improving network performance, or simply overcoming IPv4 address shortages.
In our previous blog Configuring Magewell Pro Convert Devices to Transport NDI® Streams Across Different Subnets of the Same Network, we explained how to configure Magewell Pro Convert encoders and decoders – as well as decoding software – to connect to each other across multiple subnets using the NDI® Discovery Server. In this article, we will describe how to use NDI® decoding software to receive NDI® streams from different subnets of the same network without requiring NDI® Discovery Server, instead of using static IP addresses.
Devices Used in this Example:
- One Magewell Pro Convert encoder (Pro Convert HDMI TX is used in this example)
- One PTZ camera (as a source for the Pro Convert encoder)
- One laptop (Laptop A) with NDI® encoding software (NDI® Test Patterns is used in this example) installed
- One laptop (Laptop B) with NDI® Access Manager and NDI® decoding software (NDI® Studio Monitor is used in this example) installed
- Several HDMI cables and network cables.
Workflow Overview
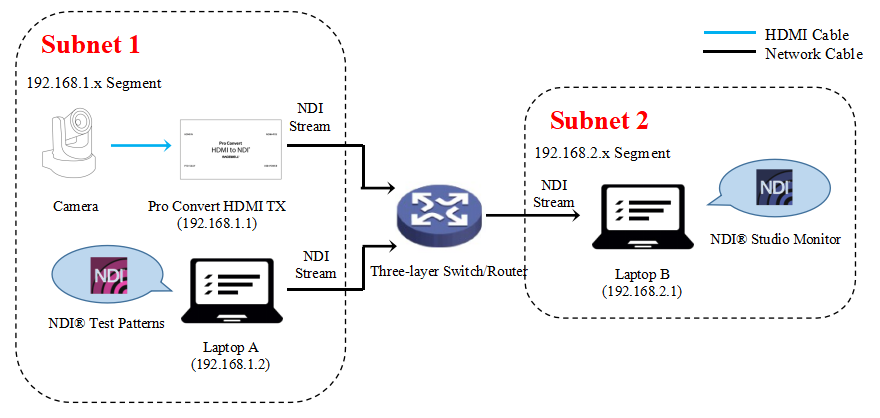
In this example NDI® workflow, the encoding solutions (a Magewell Pro Convert hardware encoder and NDI® Test Patterns software running on Laptop A) and decoding end (NDI® Studio Monitor software running on Laptop B) are in different subnets of the same network. The Pro Convert encoder and Laptop A use IP addresses 192.168.1.1 and 192.168.1.2, respectively, while laptop B uses IP address 192.168.2.1. The content flow is outlined in the device connection diagram below.
Steps:
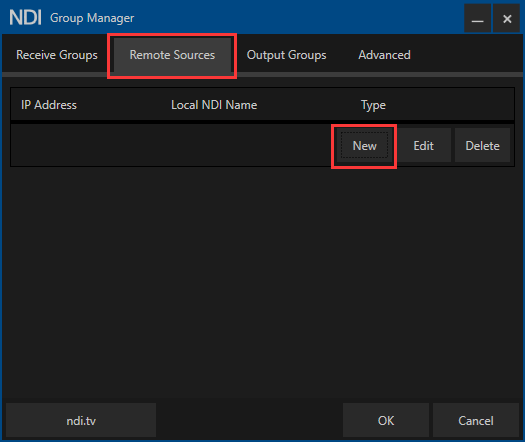
1. Open NDI® Access Manager on Laptop B, select the "Remote Sources" tab, and click "New".
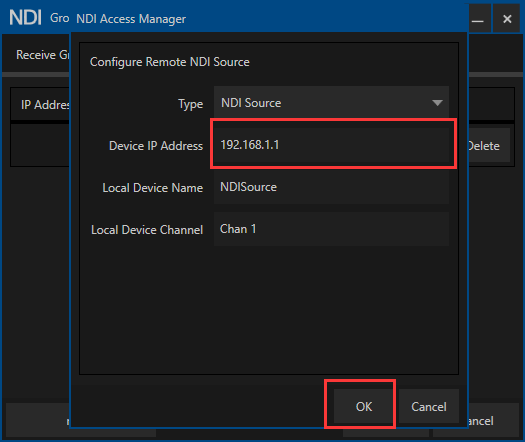
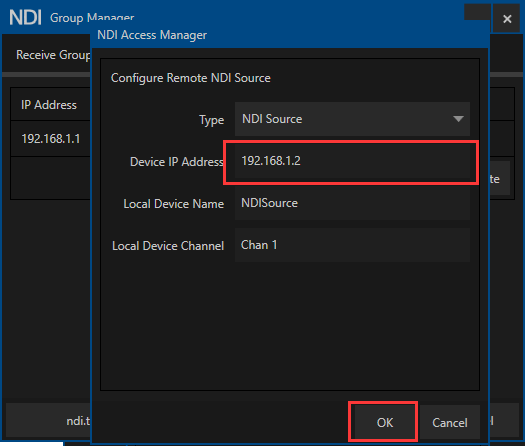
2. In the pop-up page, select "NDI Source" in the "Type" drop-down menu.

3. Fill in the IP address of the encoder (192.168.1.1 in this example, for the Pro Convert encoder) in the "Device IP Address" field and click "OK".
4. Repeat steps 1 and 2 to create another new NDI Source, then fill in the IP address of Laptop A (the one with NDI® Test Patterns installed) in the "Device IP Address" field (192.168.1.2 in this example). Click "OK".
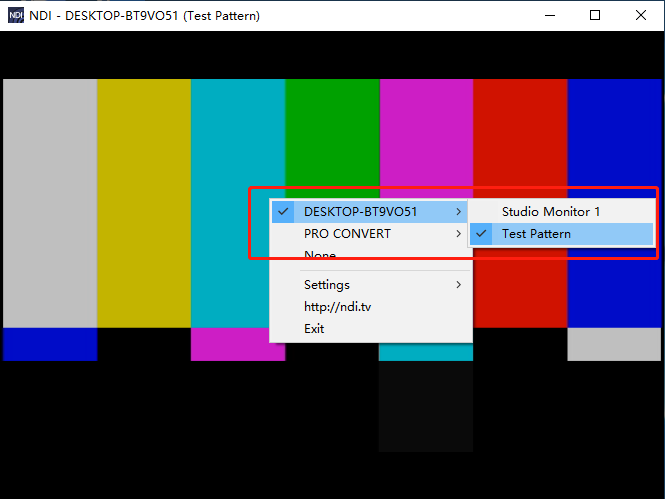
5. After completing the above steps, NDI® Studio Monitor on Laptop B can now discover and decode NDI® streams sent by the Pro Convert encoder and NDI® Test Patterns software in different subnets of the same network.