Automatically uploading recorded video clips from Magewell Ultra Stream encoders to an FTP server
Beginning with firmware version 1.5.170, Magewell Ultra Stream encoders can automatically upload recorded video clips to a user-specified FTP server or FTP site. This blog post explains how to use this feature.
Devices Used:
- One Magewell Ultra Stream encoder (an Ultra Stream HDMI model is used in this example)
- One laptop or other system running FTP or SFTP server software (freeFTPd is used in this example) or an existing FTP site
- One PTZ camera (as the source for the Ultra Stream encoder)
- One laptop, several network cables and HDMI cables.
Steps:
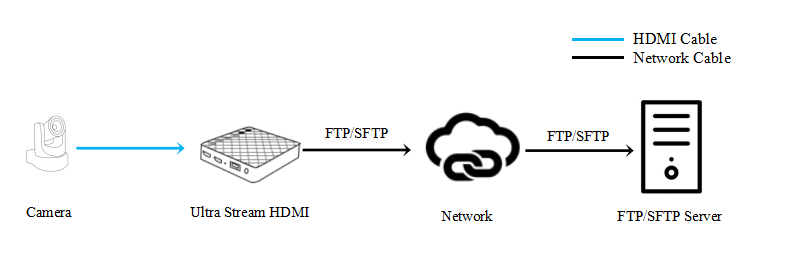
Our content flow is outlined in the device connection diagram below.
1. If you do not have an existing FTP server or FTP site you wish to use, your first step will be to configure your FTP server. Install and run the freeFTPd software on the server host system. In the FTP tab, specify the IP address of the host system as the “Listen Address” (192.168.8.27 in this example) and specify the “Port” number (2124 in this example). Then click "Apply & Save", followed by "Start".
Configure SFTP in the same way. Click the "SFTP" tab, then enter the IP address of the host system in "Listen Address", and specify a “Port” number (2224 in this example). Then click "Apply & Save" and "Start". After following these steps, the FTP and SFTP servers have now been started.


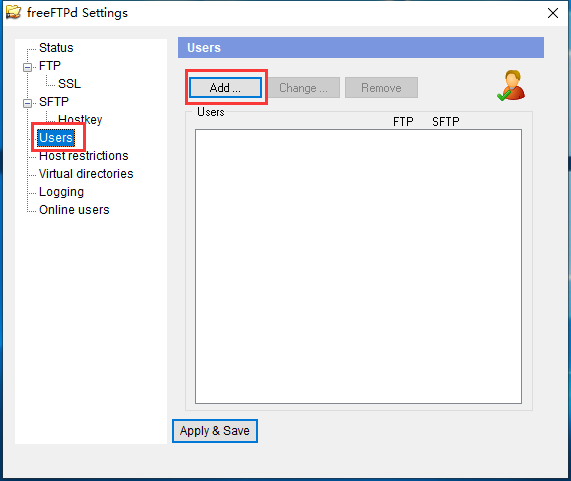
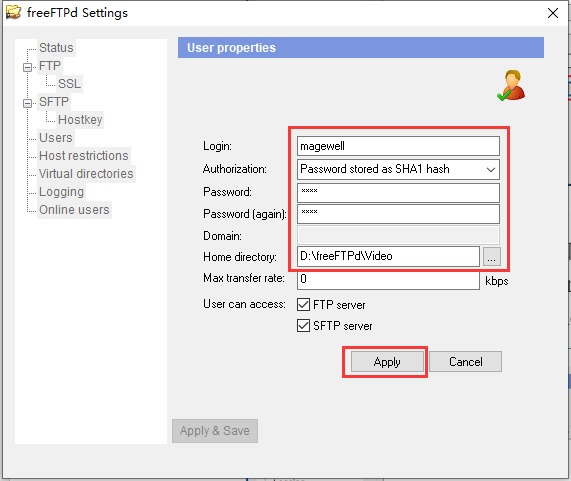
2. Now configure the login credentials that your FTP server will use. Enter the "Users" tab, and click “Add”. Specify a “Login” name ("magewell" in this example), select the authentication method ("Password stored as SHA1 hash" in this example), and specify a password. (In freeFTPd you will need to specify the password twice to confirm it). Finally, select a shared folder path as the FTP server’s "Home directory" ("D:\freeFTPd\Video" in this example).
3. Log into the Web GUI of the Ultra Stream encoder, and select the "Upload" tab. Turn on the "Auto-upload" switch and click "Edit".

4. In the pop-up page, select "FTP-File Transfer Protocol" or "SFTP-SSH File Transfer Protocol" in the "Protocol" field. Fill in the “Host” IP address and "Port" of the FTP or SFTP server (192.168.8.27 and either 2124 or 2224 in our example, depending on whether you are using FTP or SFTP).
In the "Directory" field, you can specify the name of a subfolder where transferred files will be saved. If this field is left empty, the files will be saved in the shared folder configured in the FTP or SFTP server ("D:\freeFTPd\Video" in this post). Below, we have filled in "1" in the "Directory" field, so files will be saved into D:\ freeFTPd\Video\1.
Turn on the "Authentication" switch, and fill in the "Username" and "Password" to match those that you specified when configuring the FTP server.
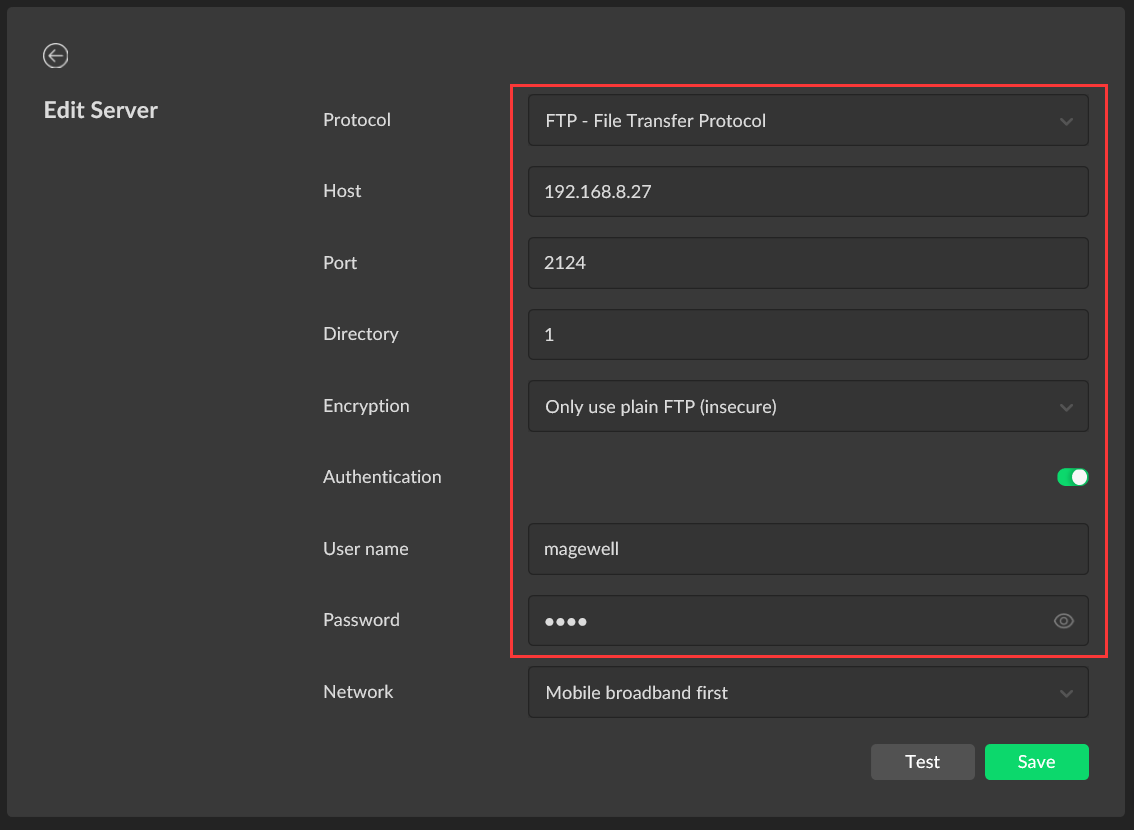
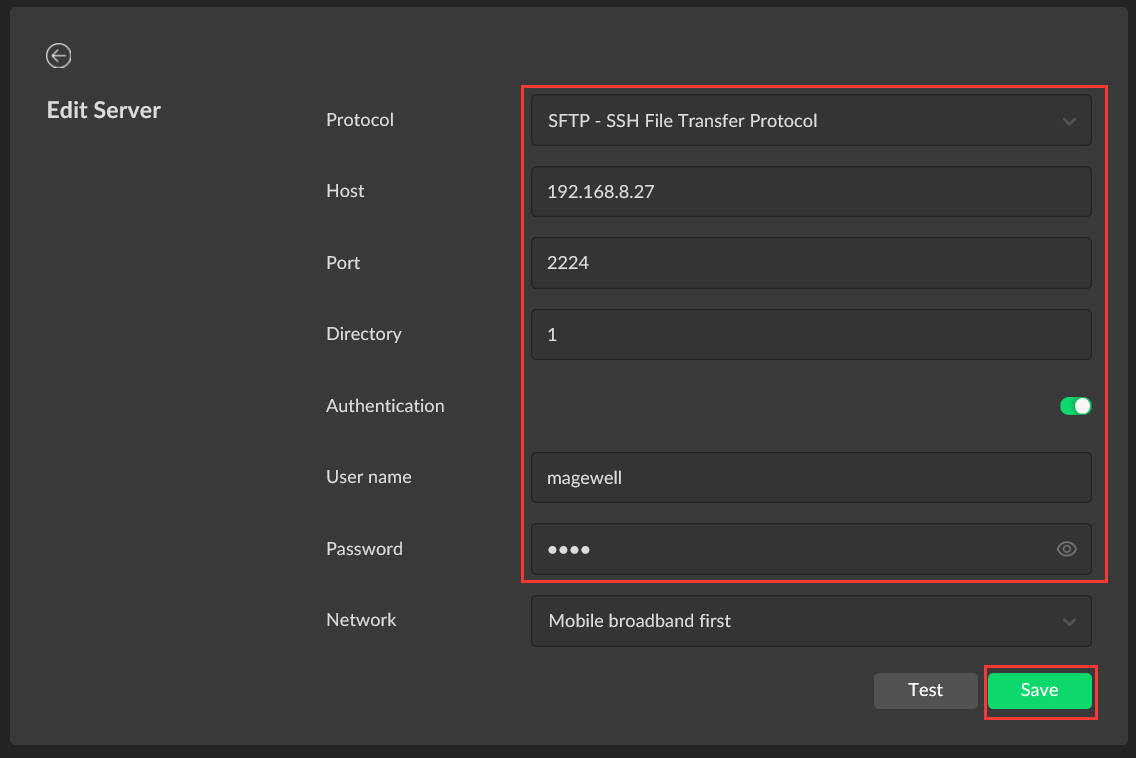
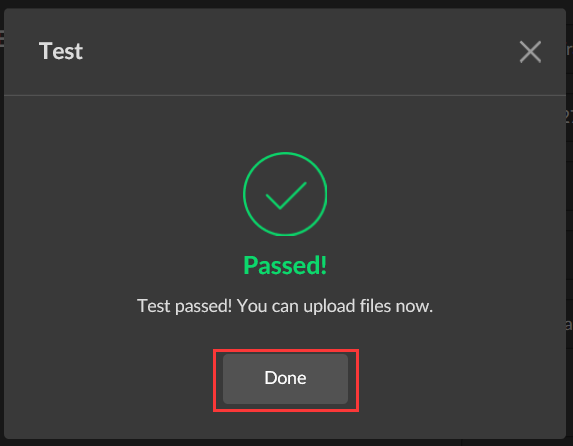
Click "Test" to confirm successful connection to the FTP or SFTP server, then click "Done".
5. Recorded files can now be automatically uploaded to the specified folder of the FTP or SFTP server.
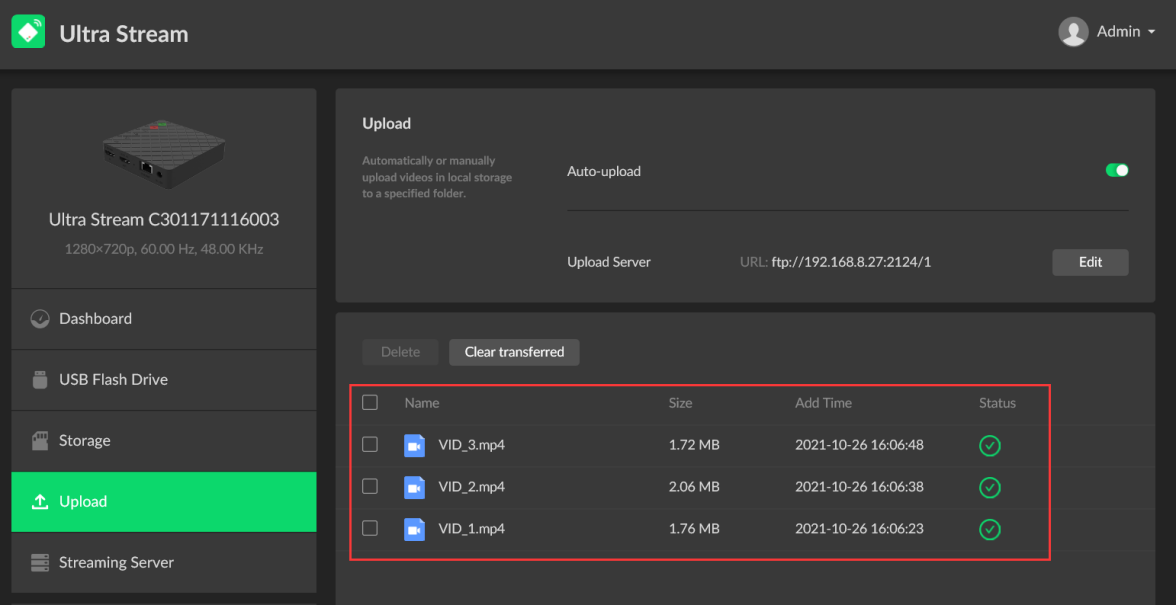
6. If you prefer to manually upload only specific files, Ultra Stream also offers the option of manually uploading files from the storage tab of the Web GUI.