Tutorial 3: Install Control Hub with Docker on Mac

Read this tutorial to learn how to install Docker on macOS and run your Control Hub image.

Prerequisites

  1. Docker and Docker Compose installed on your Mac. If you need help follow docker installation guide (Mac). Some knowledge of Docker and Docker Compose is good to have.
  2. Some experience with shell and Mac commands since there's a lot of movement in there.
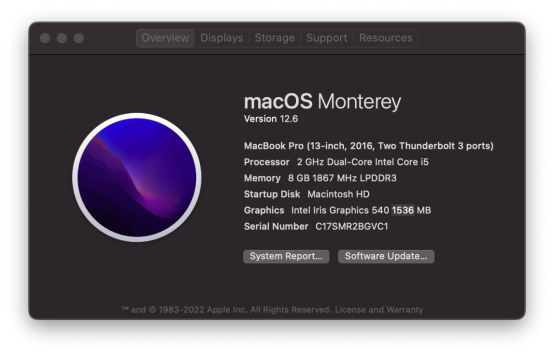
  3. The macOS device we used is as follows.

Step 1: Install Docker

  1. Get Docker.dmg for your MAC chip type from docker official tutorial.
  2. Double-click Docker.dmg to open the installer, then drag the Docker icon to Applications.
  3. Check Docker icon in the Applications folder.

Step 2: Run Docker

  1. To verify that Docker Engine is installed successfully: run hello-world
    sudo docker run hello-world

    The output as below indicates that Docker is working correctly:

  2. Check hello-world in Docker > Images.

Step 3: Install Control Hub on Docker

  1. To get the latest version: run docker image pull in Terminal .
    sudo docker image pull magewell/control-hub:2.1.51

    The output indicates that Docker in working correctly:

  2. Check Control Hub image in Docker > Images.
  3. Create a new folder for Control Hub data saving:
    1. Create folder control-hub in the Applications directory
    2. Share the control-hub folder by adding its path to Docker > Preferences > Resources > FILE SHARING
  4. Type the docker run in Terminal to start Control Hub. Specify port group 7900-8000 for UDP service transmission. Change the range if occupied. And map data and log under the Applications/control-hub path:
    docker run --name control-hub -it -v /Applications/control-hub/data:/data -v /Applications/control-hub/log:/log -p 80:80 -p 1935:1935 -p 443:443 -p 7900-8000:7900-8000/udp -v /var/run/docker.sock:/var/run/docker.sock --restart unless-stopped -d magewell/control-hub:2.1.51

    Check Control Hub in Docker > Containers.

Step 4: (optional) Update Control Hub

The Docker must be running and Control Hub must be deployed when updating Control Hub.

  • If the current version is 2.1.49 or higher, the Control Hub supports online upgrading. You can update to the latest detected version under "Settings > Upgrade > Online Update".
  • If the current version is below 2.1.49, please follow the steps below to upgrade.

    Here takes update Control Hub to 2.0.85 version as an example to illustrate the upgrade method.

    1. Find the update_control_hub_macos.sh in /data/script folder of Control Hub.

      If the update_control_hub_macos.sh is missing, contact us.

    2. Open the Terminal.

    3. To auto-download the update package, just drag and drop update_control_hub_macos.sh file inside the Terminal window. The full path of the dragged will instantly appear.

      Or you can manually update Control Hub to a specified version, for example v2.0.85. First, obtain the target version number. Then enter the following objects into Terminal in the following order.

      1. drag and drop update_control_hub_macos.sh.
      2. enter a space.
      3. enter the target version number.
      Terminal should display as follows:

      Check the target version of Control Hub after update. You can find the Control Hub version at the upper left after logged-in successfully.

Post Deployment

  1. To access Control Hub WebGUI: open your browser and input IP address of Mac, and 80 the default HTTP with the form as http://IP-address.

    Then you should see a screen as the figure below.
    The default admin username and password both are Admin, case-sensitive. After the initial login, we highly recommended that you secure access by changing the default password.

  2. To connect your device to Control Hub, go to Add Devices to Control Hub Tutorial.